Week 2
Introduction to adobe illustrator
Task 1
1. Open adobe illustrator (find it using the magnifying glass)
2. Go to Archivo - Nuevo
3. Nombre -Exercise 1
4. Set up the page to letter size and horizontal orientation
5. Today we are going to learn 3 tools
a. text tool
b. rectangle tool
c. selection tool
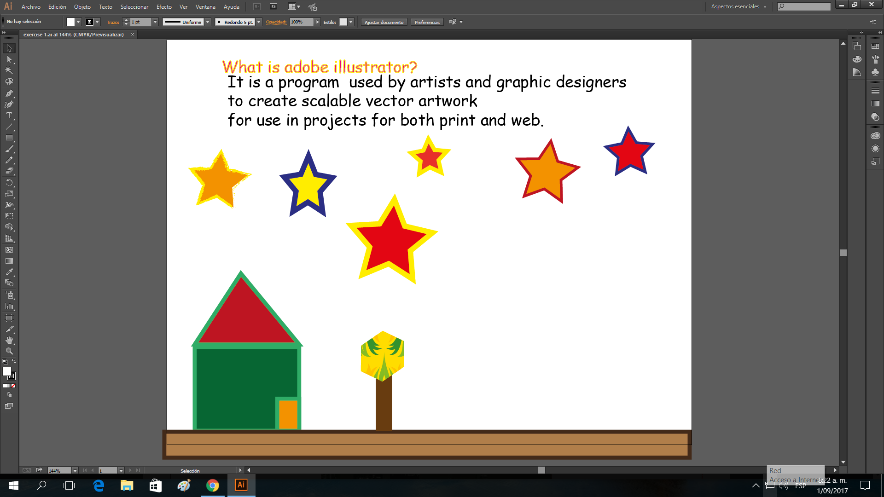
6. Using the text tool you will answer what is adobe illustrator (font size 24, style comic sans, color blue)
7. Using the rectangle tool (right click) you will create a drawing using only shapes. It can be a house with sky with the moon and stars, etc. The idea is to use shapes. Use color to fill the shape and also a different color for the shape border.
8. Remember that you can use the selection tool to move the shapes around.
9. Saving your work. (Save it as pdf)
10. Send it to the teacher email mherrera@agustiniano.edu.gt
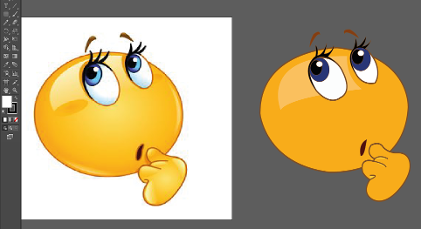
1. Find a simple image in google and save it on the computer
2. Open adobe illustrator
3. Go to archivo Name it exercise 2
4. Layout of the page horizontal
5. Go to archive colocar and find your saved image
6. You can make it big almost the size of the paper
7. Where it says capas lock the capa of the original drawing
8. Open a new layer (capa)
9. Using the pluma tool you are going to draw the same picture
10. Click and hold and you can do the angles
11. If you don´t like something ctrl z will undo it
12. When you finish drawing you need to color it
13. With the dropper tool o herramienta cuentagotas se puede colorear del mismo color que el original
14. When you finish send me the original image and your drawing to my email.
